Summary #
For advanced users(no instructions needed) #
Our digital cutter uses spot colors to determine how to cut/crease/punch/kisscut your art. Download spot colors by clicking here. Remember to assign the stroke as “overfill stroke” in your attributes pallet so that artwork underneath will still print and you don’t get thin white lines in your final product.
What is digital die cutting? #
Digital die cutting is basically an exacto blade that’s controlled by a machine. We use special colors on the artwork to help the machine determine what to cut/crease/punch/kiss-cut. Read on to learn what that means and how to set up in Illustrator and InDesign. If you don’t use either, then we suggest learning either one – it’s worth it.
What each spot color means #
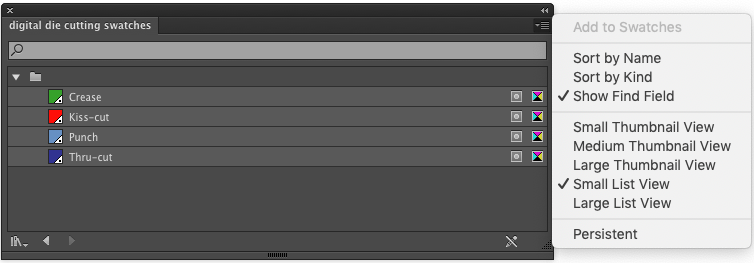
Crease – It’s a channel that is pressed into card stock to make it easy to fold. Think of the lines that you see at the fold of a greeting card.
Kiss-cut – This is a cut half way into the sheet. This is typically used for labels. Think of those cool sticker sheets that you can peel individual stickers off of.
Punch – This is like a Thru-cut but it’s used in reference to punching out holes or intricate designs within a bigger piece. Typically anything within this cut will be discarded.
Thru-cut – This cuts a shape out of a piece of paper. Anything outside the cut will be discarded.
Load Digital Die Cutting Spot Colors into Illustrator / InDesign #
These instructions are designed for illustrator or indesign users. If you don’t currently use one of these two programs then learn them lol. It’s so worth it if you’re planning to design
- Open illustrator / InDesign.
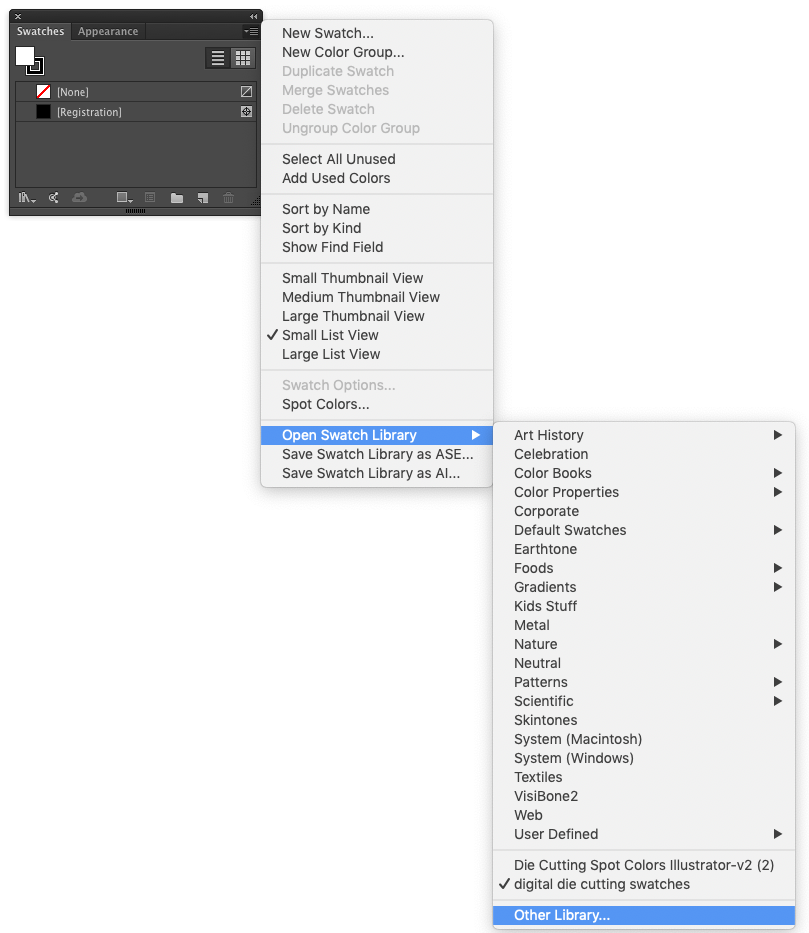
- Download the ASE file (short for Adobe Swatch Exchange) here.
- Open illustrator swatches panel by clicking on top tab “Window”-“Swatches”.
- Click on the tiny icon on the top right of the swatches pallet, then click “Open swatch library” – “Other library”. In InDesign it’s similar except you click on “Load Swatches” instead.


- Open the ASE file you just downloaded. Click here if you need it again.
- This pallet should open up. You can see the names more easily if you click on the tiny menu button and select “small list view”.

- Great! You’ve got them loaded!
How to set up your file for digital cutting #
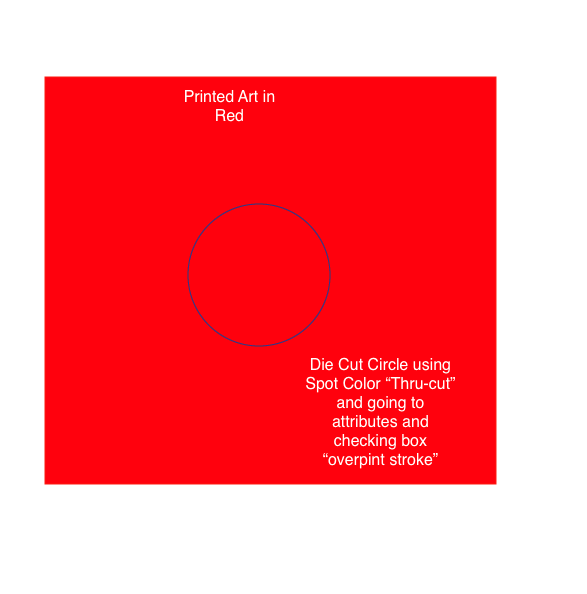
This shows you how to cut out a circle within your art.
- To cut all the way through the document, select the stroke, make it 1pt thickness and select the “Thru-cut” spot color.
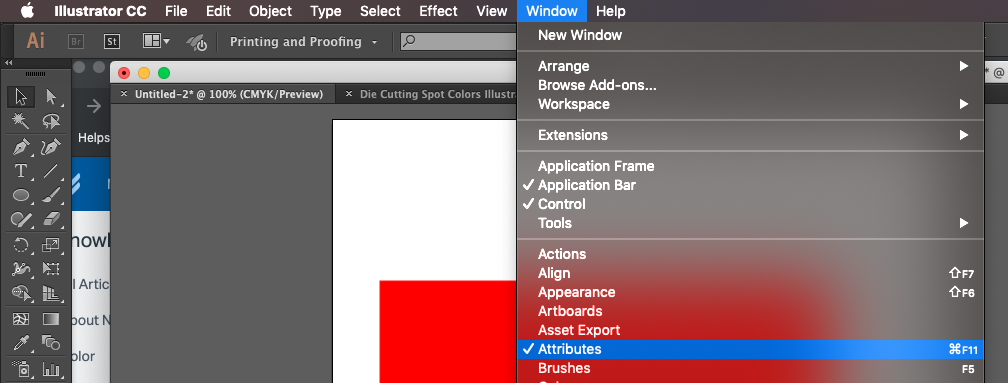
- Select the stroke you just assigned and go to top tab Window- Attributes.


- Check on box for overprint stroke.
- Great! Now you just need to export your PDF. Click here to learn how we like our PDFs and how to export your files.
- Final example below. We just used a red box to represent printed artwork.

#
How to check your artwork to ensure it prints and cuts correctly #
Here’s a link to the artwork samples. You can follow along with the files in the link.
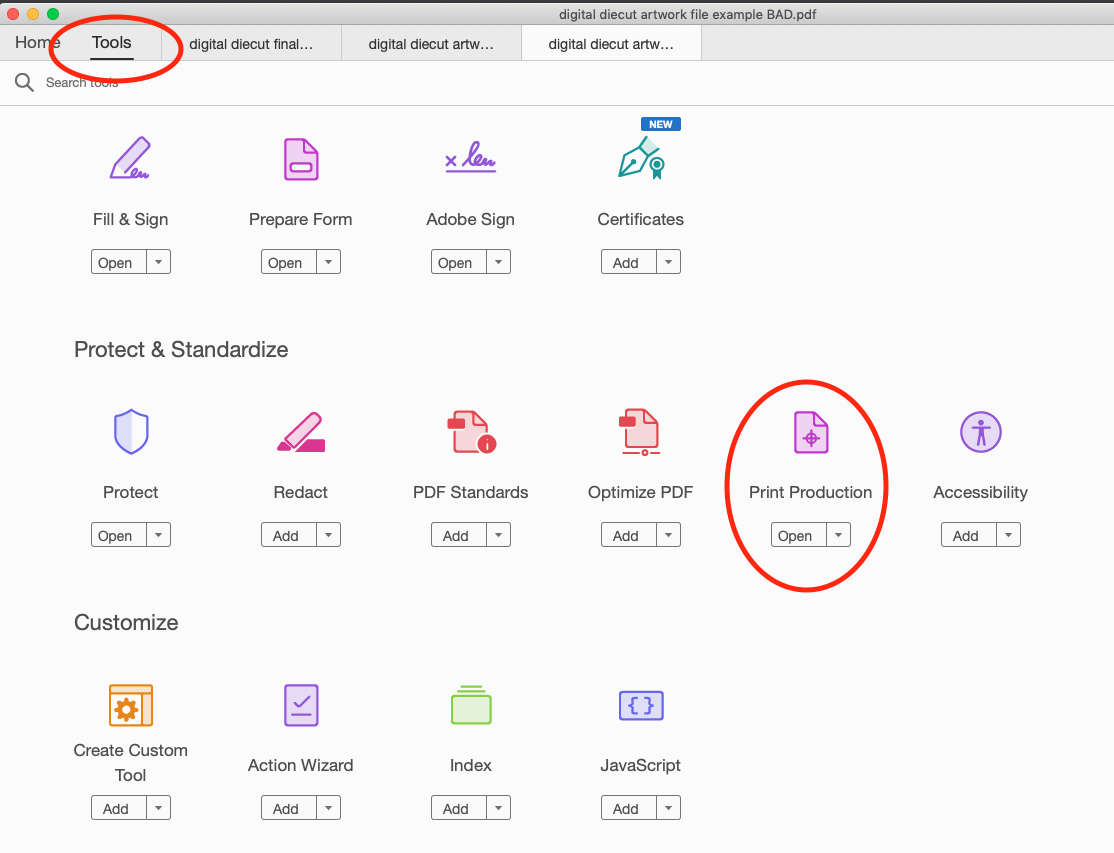
- Open the files in acrobat. Click on Tools, then open “Print Production”


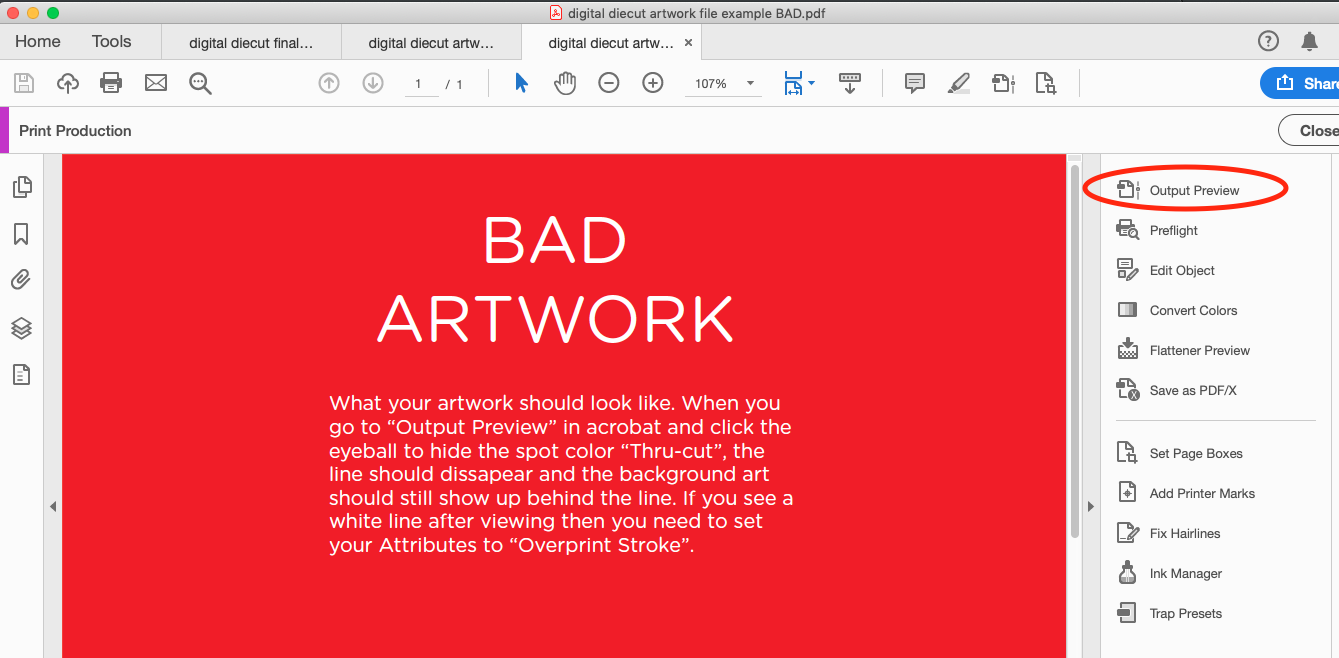
- Click on “Output Preview” on the right side.
Example of incorrect artwork #
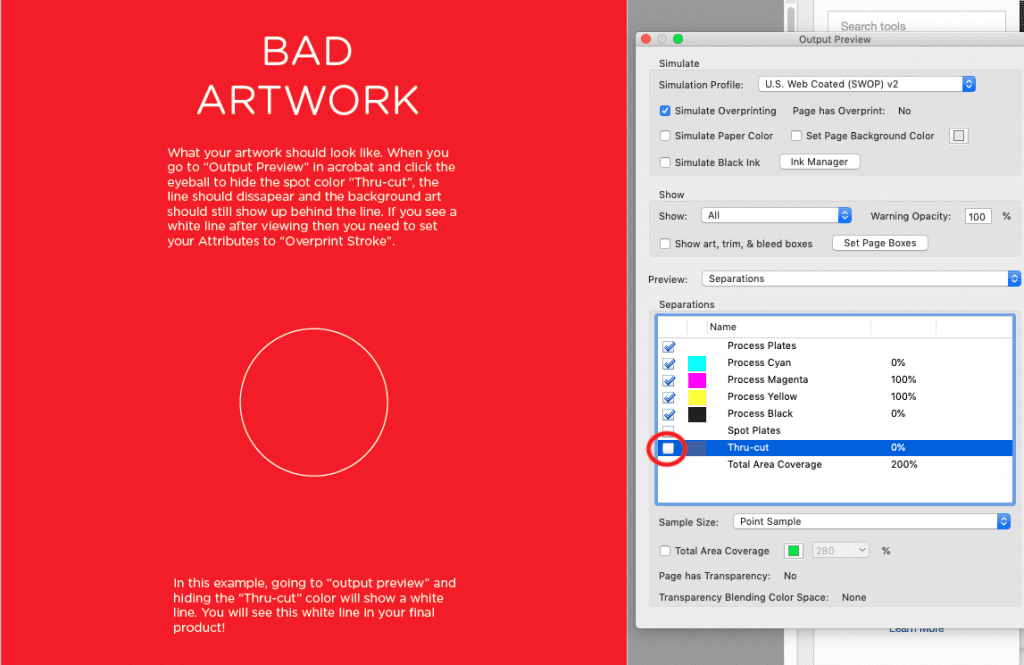
Uncheck the box “Thru-cut”. If your artwork was set up correctly, no white line will show up. If it’s done incorrectly, a white line will show up and you will likely see it in the final product.
Example of good artwork #
When you uncheck the box for the spot color “Thru-cut” the dark circle should disappear and there should be no white line. This is important so that we print all the artwork that is underneath. If you see a white line in your artwork, you will likely also see that in the final product.
Thru-cut Checked
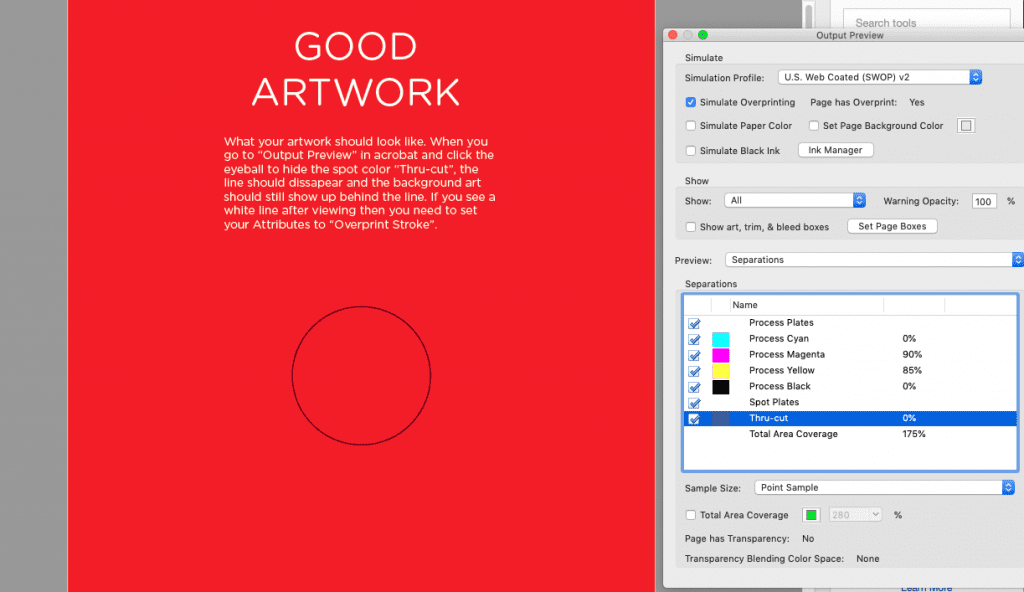
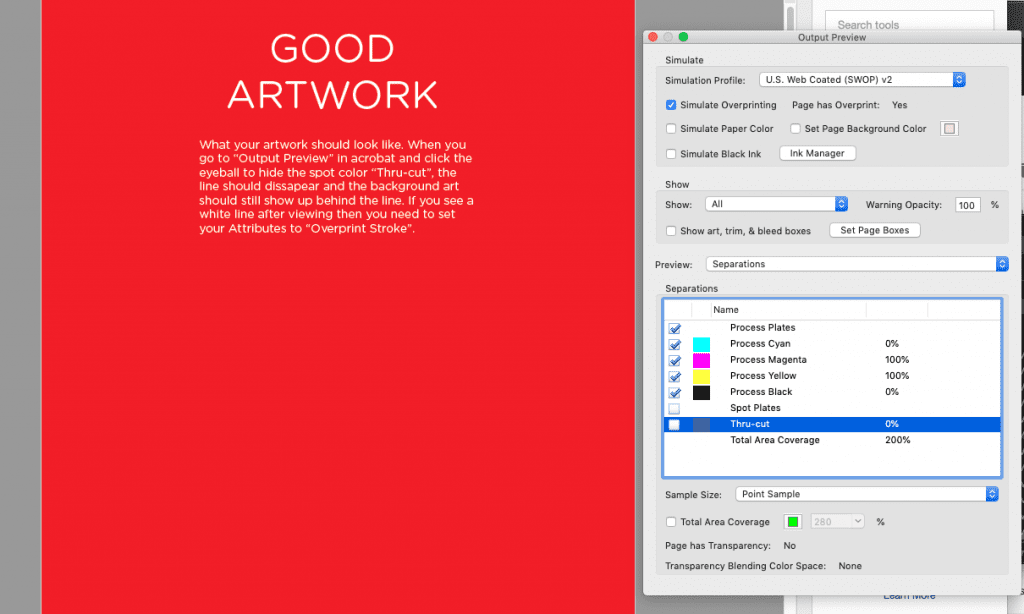
Thru-cut Unchecked


